There are many types of malware infections. At Antivirus Insider, we have talked about the major ones such as Ransomware attacks, adware infections and Trojan horse malware. Most of these threats are curable; or, at least, you can take some precautions. In some cases, however, malware infections are so dangerous that you cannot even access your PC. Literally speaking, you cannot boot up your Windows PC – then, how are you going to use the antivirus scanning software? That is why Security Developers introduced the concept of Rescue USB Discs.
In one of our previous articles, we had talked about the best bootable antivirus programs you can check out. And, Kaspersky Rescue Disk was one of the prominent names in the list. Today, we have decided to tell you how you can get the best from Kaspersky Rescue Disk. We will give you a step-by-step tutorial on how you can create Bootable Kaspersky Rescue USB Stick. Yeah, you don’t need a physical CD to get the benefits. On the other hand, a standard-capacity USB Drive should do the job. And, yes, you can count on this method if you are not able to access your Windows PC due to malware infections.
Before We Start: There are a few things you should know and have before we start creating the Kaspersky Rescue USB Stick. First of all, you should have a USB Drive with capacity of more than 256MB. We hope you all have one of those drives with you. The drive should be properly formatted in FAT16 or FAT32 File System. It should not have any other bootable content installed in it. If that’s done, we will move onto the installation part.
Step 1:
You have to download a few files from official servers of Kaspersky. The list and links are as follows.
- Kaspersky Rescue Disk 10 — ISO Image — Official Link
- Kaspersky Rescue Disk to USB Recorder Utility — .EXE file — Official Link
Make sure you have downloaded and stored both files in someplace accessible.
Step 2:
Given that your account has administrator access, the Recorder utility will be automatically launched. There is an option to change the location where the Rescue Disk files are stored, though. You just need to make a few changes while you’re in the Installation wizard. There, you will see the default Destination Folder. Press the ‘Browse’ button to change it.
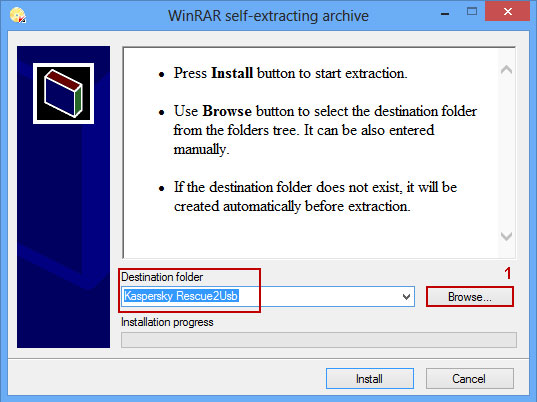
In the upcoming pop-up window, you have to select the place where you want to store the Rescue Disk files. Click OK to continue with the process. Now, click the ‘Install’ button to start the installation process.
Step 3:
Once the installation is completed, Kaspersky USB Rescue Disk Maker will be automatically opened. In that interface, you need to choose the ISO file you’ve downloaded. Hit the ‘Browse’ button and choose the .ISO file from stored location.
Connect the Empty USB Drive to your computer and wait until it’s detected. Now, from the same interface, you can choose the desired USB Device via the drop-down menu.

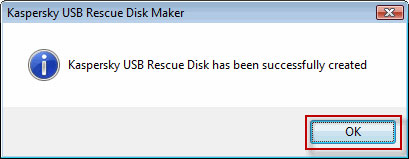
Once you have selected both, you can hit the ‘Start’ button and wait until the process is completed. When it shows the successful message, click on ‘OK’ to continue.
Step 4:
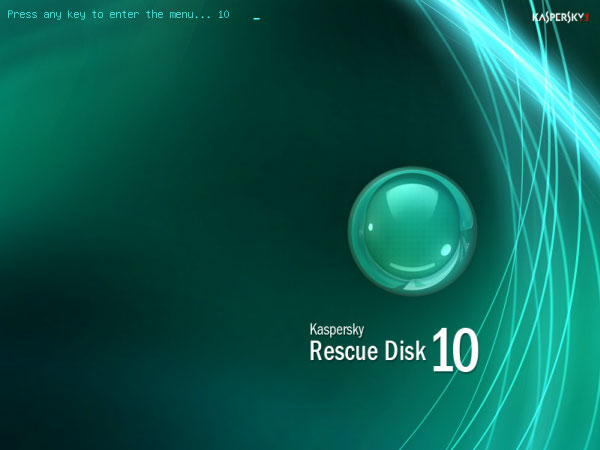
Now, you have successfully created Kaspersky USB Stick. Reboot your computer to continue the options. In the screen, you will see a message to press any key. It should be done within 10 seconds. Otherwise, the PC will boot up from Hard Disk Drive.
If you press any key, you will be asked to select the Language in upcoming window. After selecting preferred language, you can hit ‘Enter’.
In the next page, you will be shown the License Agreement and other Conditions of Kaspersky Rescue Disk. If you want to continue with the terms, press 1. If you want to reboot or shut down your PC, you can press 2 and 3 respectively.
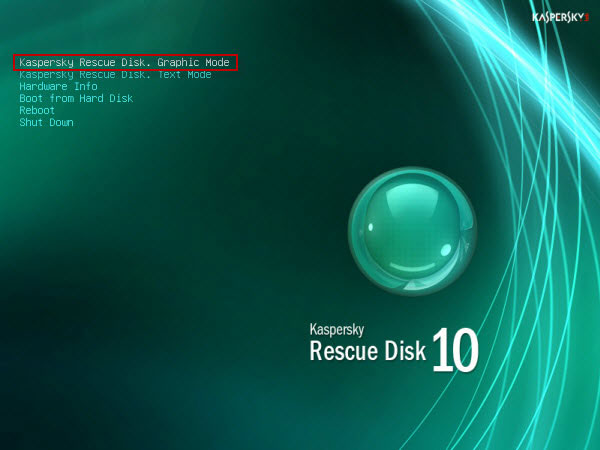
Now, you are in an important step. Here, you have to select what you like to do with Kaspersky Rescue Disk. You can launch the antivirus program in Text Mode or Graphic Mode. Also, there is an option to get info of computer hardware. You can also boot from Hard Disk if you want to go back. Once you have selected your desired mode, hit the ‘Enter’ button to continue.
That’s It
Tada! Now, you will be in the main interface of Kaspersky Rescue Disk. Here, you have options for scanning, cleaning and resetting your computer. However, make sure that you have update the virus definitions before you perform antivirus scans. As we said earlier, this is a suitable method for fighting against ransomware and other types of screen-blocking malware. In most cases, you can recover lost data. Even if you cannot recover data, there won’t be any issue in accessing PC resources. We hope this guide helps those are in trouble. We recommend you to use Kaspersky Total security in your computer to avoid situations like this.
Hey,
Kaspersky Rescue Disk is a software suite with tools like a free bootable antivirus program, a web browser, and a Windows Registry editor. The virus scanner lets you scan any file or folder on the computer without requiring you to scan the entire hard drive, which is a very useful feature