Be it on Windows or Mac, Kaspersky 2017 is the antivirus that you can install in a few minutes, at max. Such simple are the process and steps that you won’t have trouble even if you are new to the world of anti-virus packages. In our previous articles, we had told you how you can install Kaspersky 2017 in Mac and your other devices. This article is an essential extension to those steps.

Despite the fact that Kaspersky has a smooth installation procedure, there can be trouble sometimes. Your installation process may get corrupt or there may be some other issues. The issues can be either due to set-up package or due to the issues in your Windows or Mac. In such situations, the option you have is to repair the Kaspersky installation.
In another scenario, you may want to reinstall Kaspersky 2017 in your device. It can be because you found some issues. For instance, you may have to give some extra permissions that you didn’t give in the first place. Or, it can be after fixing some major issues in your PC. Alternatively, a casual re-installation of antivirus suite is a good thing for your own security.
Today, in this article, we will give you a step-by-step tutorial for repairing or reinstalling Kaspersky 2017 from your PC and Mac. We have prepared separate tutorials for Windows PCs and Macs, so that there won’t be any confusion.
How to Repair/Reinstall Kaspersky 2017 Installation in Windows?
Note: Kaspersky 2017 does not have an in-built option for Repairing the installation. So, when you want to fix some issues, you have to remove the program completely. After the removal, you can fix the causing issue of your PC — if anything is present. Once you have dealt with the issue, you can move forward to re-install the Kaspersky program you have purchased. Now, we will move onto the steps.
Removing Kaspersky from your Windows PC
Step 1:
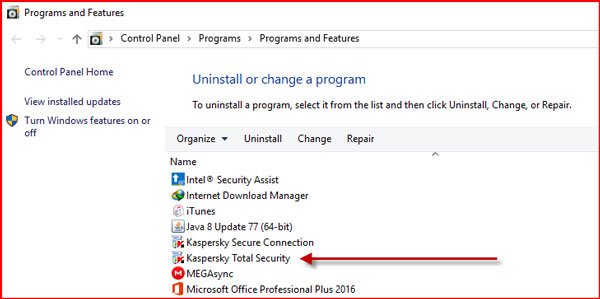
As the first step of uninstallation, you have to go to Control Panel and select Programs and Features.
From the options, choose Uninstall a Program. Now, you should be able to see the list of programs you have installed in the computer.

Find Kaspersky 2017 from the list and double-click on it.
Step 2:
Instantly, you can see a pop-up, asking your permission to uninstall Kaspersky from your PC. Hit Accept to continue the uninstallation process.
Step 3:
This is an important step while removing Kaspersky 2017 from PC. As you can see, there is an option to save some essential information for later use. You will be able to save License Information, Operational Settings, iChecker Data and Data Encryption.

Out of these, we recommend saving License Information and Operational Settings for later use. This way, it will be possible to retain the same experience after re-installing the product.
Once you have made the selection, click Next to move forward.
Step 4
You will have to wait a few seconds to let the wizard complete uninstallation. You will find a message once it has successfully removed Kaspersky 2017 from your PC.
We highly recommend rebooting your system for hassle-free removal and re-installation.
This is how you can remove Kaspersky 2017 from your PC, completely. Now, we can move onto the re-installation part.
Re-Installing Kaspersky on your Windows PC
Here is a complete guide on How to Install Kaspersky 2017 on Windows PC.
You can follow the steps mentioned in the article. If you had saved the License Information and backed up User Settings, you won’t have to enter the license information manually. It will be automatically applied and activated. You can always buy new license for Kaspersky using our huge discount offers.
We hope that’s a huge time-saver. Make sure that you are downloading the official latest version from site of Kaspersky.
How to Repair/Reinstall Kaspersky 2017 Installation in Mac?
Note: In Mac as well, we cannot find an in-built Installation Repair option. As it turns out, you would have to uninstall the program first and re-install again. Don’t worry: we have the detailed steps covered here.
Removing Kaspersky from Mac
Step 1:
Before we start the removal, you should quit the Kaspersky interface. Along with that, you should disable its icon from MacOS tray. Just click on the Kaspersky icon and select ‘Quit’.

Step 2:
You have to download the Kaspersky 2017 installation file from official website of Kaspersky. This method is chosen because you need to completely remove the program and leave no remnants. You can download it from Here.
Make sure that you store it in an accessible place. One thing to be noted here is that you should download the appropriate setup file. We are talking about Kaspersky Internet Security and Total Security variants here. You should get the right file; otherwise, you may mess things up.
Step 3:
Open the installation setup file and you will find two options – Install Kaspersky Internet Security as well as Uninstall Kaspersky Internet Security. Of course, you have to choose the second option.
Step 4:
Here too, you will be prompted about the uninstallation.

Click ‘Uninstall’ to move forward with the removal process.
Step 5:
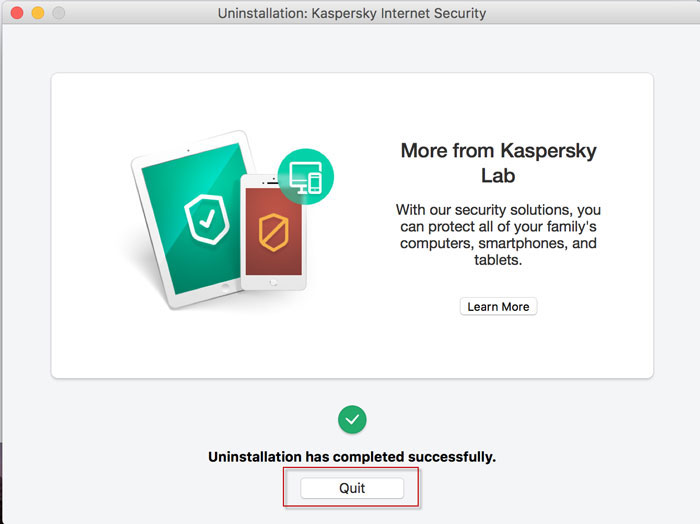
Wait for a few seconds and you will receive the message the Kaspersky has been uninstalled completely. We do highly recommend a reboot, to make things clear.

Re-Installing Kaspersky on your Mac
Here you have our complete guide for installing Kaspersky on your Mac.
Follow that guide and you would deal with the installation in no time. One thing to be noted here is that Mac version of Kaspersky 2017 does not have an option for storing or backing up license information. Don’t forget to check our special Kaspersky deals in coupon section. It means that you will have to enter the license code again and make the settings clear once again.
Summing Up
So, these are our guides to repair and re-install Kaspersky 2017 in your Windows PC and Mac devices. You’d not have to worry about the steps, because we have tried them out hands-on. That is, by following just these simple steps, you can re-install Kaspersky 2017 and start getting the best protection again. If your system is getting sluggish, you can do this for enhanced protection.
Great Post!!!
Thanks for share this information about laptops.